# Projects
## Introduction to Projects
{% hint style="success" %}
This article introduces the concept or projects and shows how to create and work with projects in the Timebook's ecosystem.
{% endhint %}
In Timebook terminology, projects are containers for work items (epics, stories, tasks, etc.) required to achieve a specific outcome. They can be created either manually, or directly from an [opportunity](https://help.timebook.ai/hc/get-started/discovery/opportunities) that you chose to pursue.
Projects can be linked to Goals through Key Results, ensuring that all work aligns with the organization’s strategic objectives.
## Creating projects
Projects can be created in two ways: manually or by escalating an opportunity to the project form.
### Creating manually
{% hint style="info" %}
Projects are a component of the Delivery module which is activated by default in new workplaces. If. you don't see this tab in the navigator, go to your team settings and check if it's activated.
{% endhint %}
{% stepper %}
{% step %}
Go to the **Delivery** tab and click 'Create first project'.
{% endstep %}
{% step %}
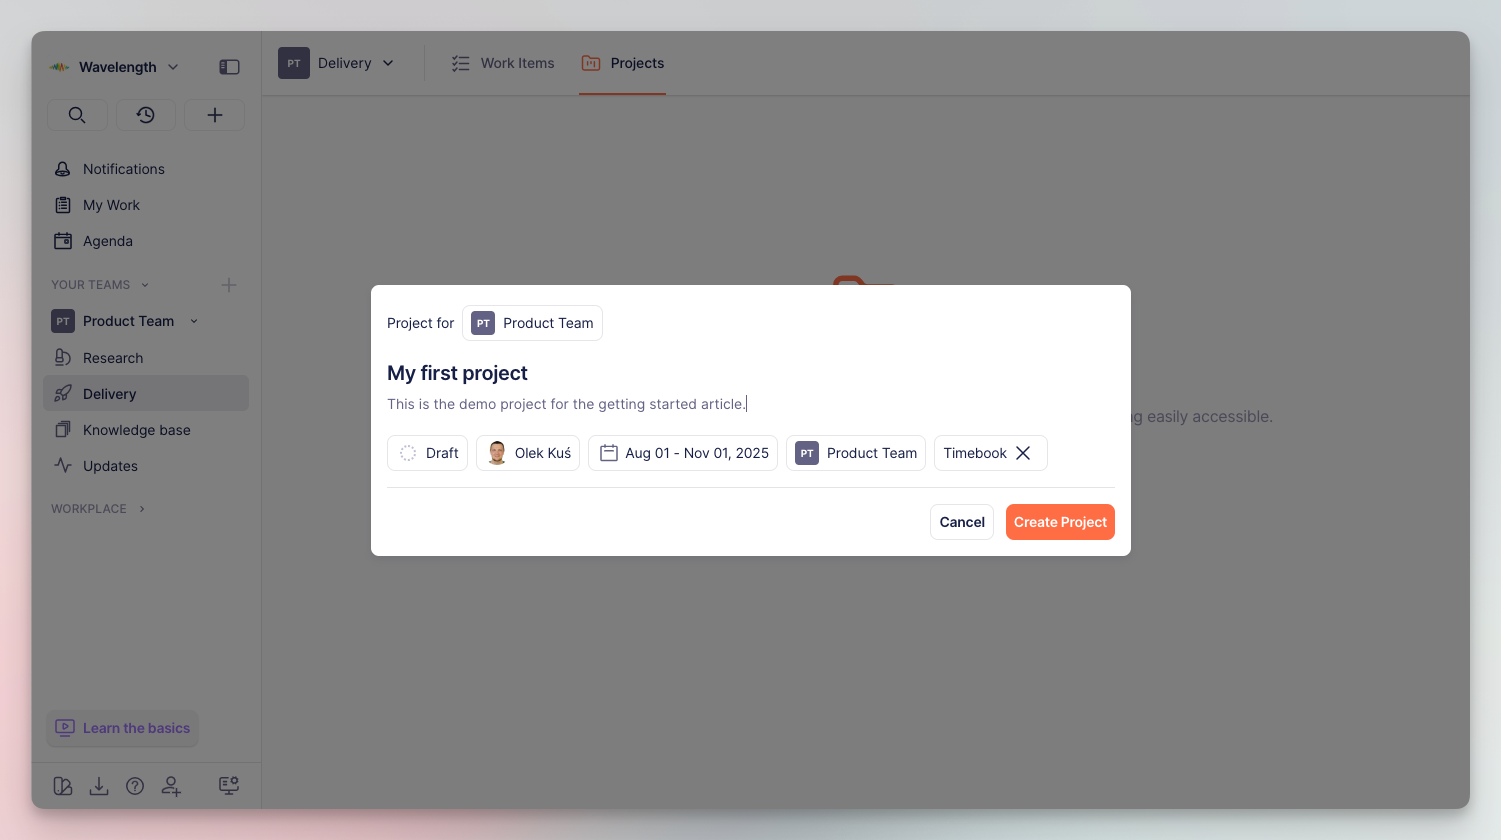
Enter the details of the project: name, description, date range for which the project is planned, team responsible, and the product it refers to:
New project configuration
{% endstep %}
{% endstepper %}
### Generating from opportunity
Once you indicate which opportunity you want to pursue, you can start preparing grounds for development by escalating it into a project.
{% stepper %}
{% step %}
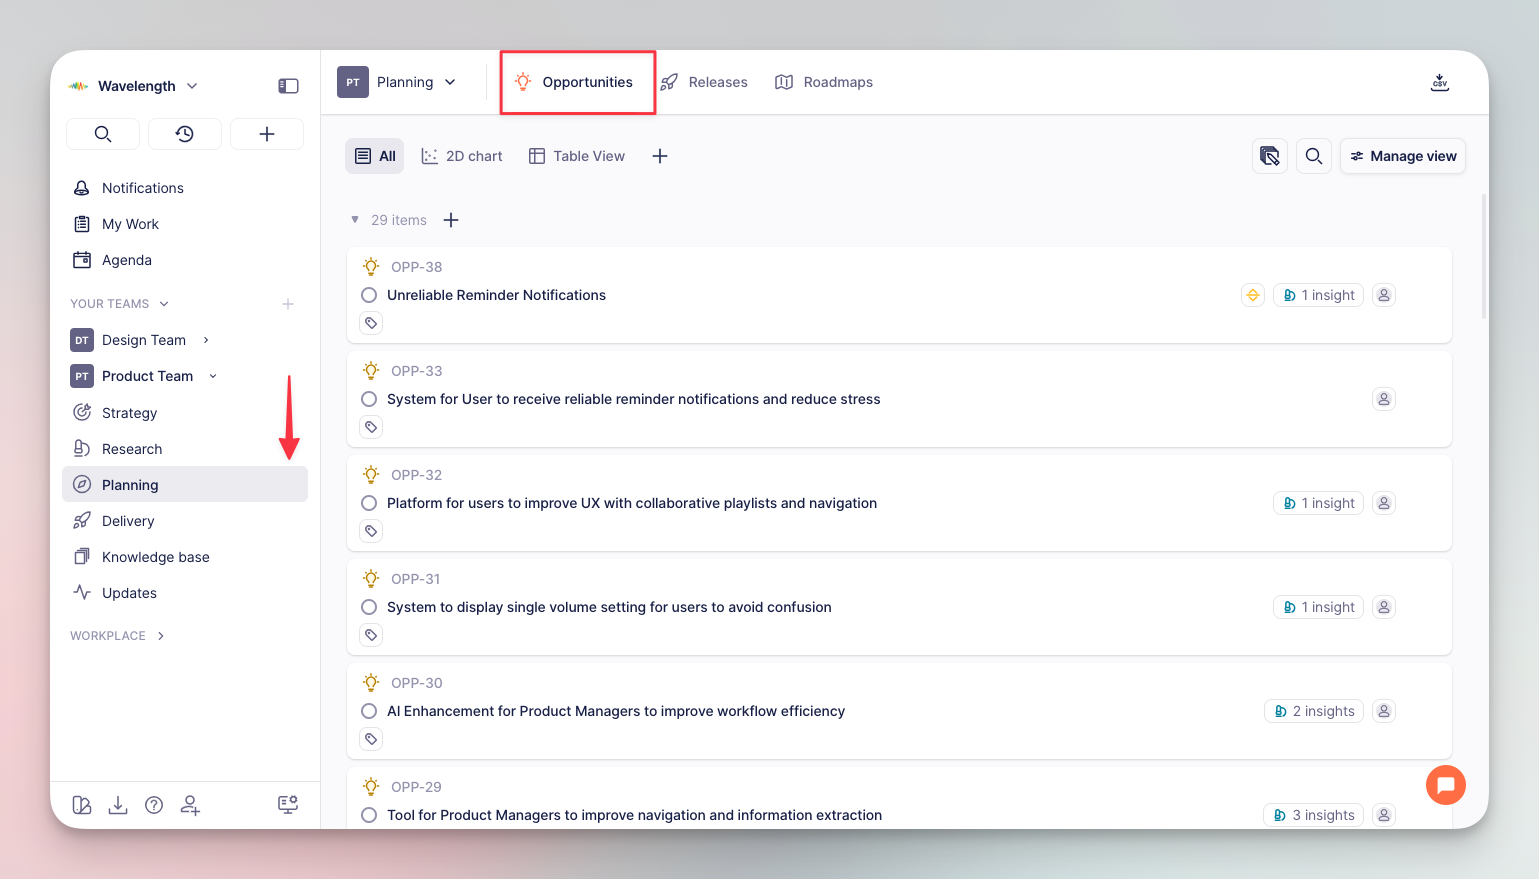
Go to **Planning** → **Opportunities** and look up the opportunity on the list.
Opportunity list overview
{% endstep %}
{% step %}
Click the 'Generate' button at the top, select 'Project', and enter the details: name, description, date range for which the project is planned, team responsible, and the parent product.
Creating project from opportunity
{% endstep %}
{% endstepper %}
### Projects overview
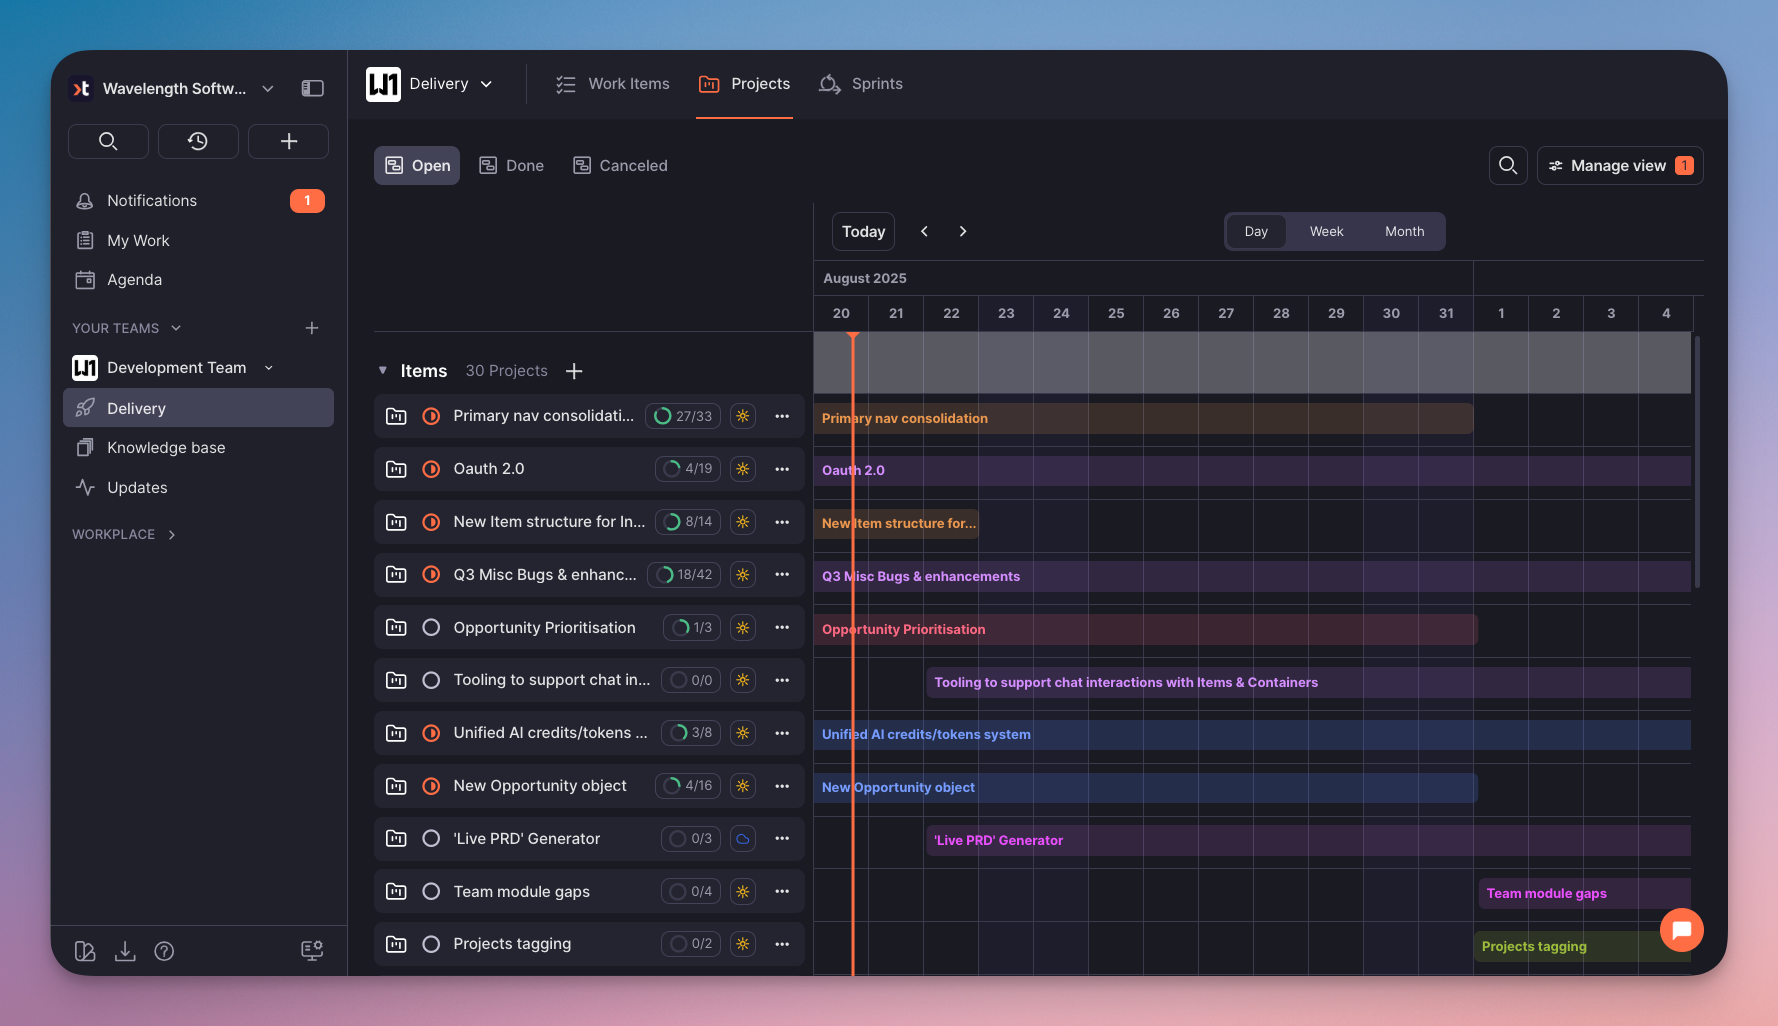
The **Projects** tab lets you browse and manage all projects in your team. The default **timeline** view provides you with essential progress information, such as current status and the number of work items, together with a calendar with marked time frames.
{% hint style="info" %}
You can change the layout and apply grouping and filtering in the 'Manage view tab'.
{% endhint %}
Here's how the timeline view looks like when fully populated.
{% tabs %}
{% tab title="Light Mode" %}
Projects overview: Timeline view (Light Mode)
{% endtab %}
{% tab title="Dark Mode" %}
Projects overview: Timeline view (Dark Mode)
{% endtab %}
{% endtabs %}
The **list** view, on the other hand, provides more details, such as linked [opportunities](https://help.timebook.ai/hc/get-started/discovery/opportunities) and initiatives:
Project details explained
{% hint style="success" %}
There is also the **board** view if you're used to working with Kanban boards.
{% endhint %}